Halloween Shadow Box SVG Guide
Creating depth and atmosphere in holiday decor often requires more than just flat prints or simple stickers. This is where a Halloween Shadow Box SVG becomes an invaluable tool for crafters of all skill levels. By utilizing layered paper cutting techniques, you can transform a standard 8 x 8 inch square into a captivating three-dimensional scene that draws the eye and sets a spooky mood. Whether you are a seasoned professional with a Cricut or Silhouette machine, or a beginner looking to try your hand at intricate papercraft, this digital template offers a streamlined path to professional-looking results.
The appeal of these designs lies in their ability to mimic the look of expensive, store-bought shadow boxes without the high price tag or the need for advanced artistic drawing skills. The file provides the precise cut lines needed to create distinct layers, which, when stacked with foam adhesive or spacers, create genuine shadows and dimension. This technique adds a level of sophistication to your Halloween decorations, making them suitable not just for children’s parties, but for elegant home displays and unique gifts.
Understanding the Layered Design Process
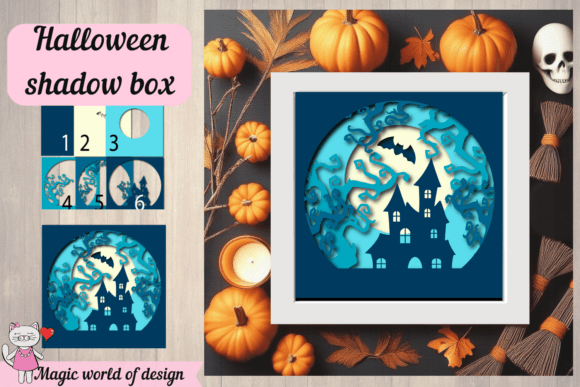
At its core, a shadow box design relies on the strategic placement of multiple layers of cardstock. Each layer represents a different part of the image, such as the background sky, mid-ground trees, and foreground elements like ghosts or pumpkins. When you download a Halloween Shadow Box SVG, you are receiving a map for this construction. The files are engineered to ensure that each piece fits perfectly within the next, maintaining structural integrity while maximizing visual impact.
For those new to this craft, the process might seem daunting, but it is surprisingly manageable. The key is patience and precision. You will typically start with the backmost layer, which often features solid colors or simple shapes to establish the base tone. As you move forward, each subsequent layer adds detail and complexity. Using a high-quality cutting machine ensures that the intricate details, such as spiderwebs or fine branches, are cut cleanly without tearing the paper. The result is a cohesive scene that looks like it was designed by a professional artist.
Versatility in Home and Event Decor
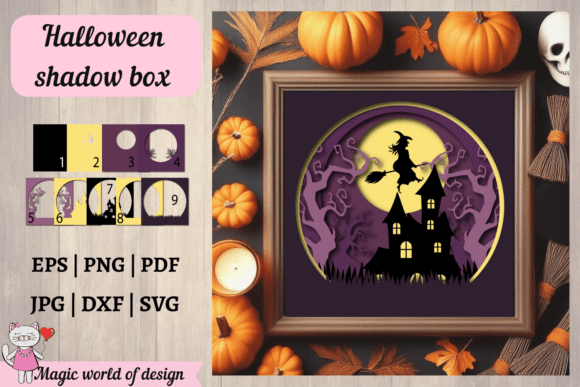
One of the greatest advantages of using a digital shadow box template is its versatility. An 8 x 8 inch frame is compact enough to fit on a bookshelf, mantle, or desk, yet large enough to make a statement. Here are several ways you can incorporate this project into your seasonal celebrations:
- Wall Art Gallery: Create a series of shadow boxes using different color palettes—such as traditional orange and black, or a more subtle white and gray—and hang them together for a curated gallery wall effect.
- Table Centerpieces: Place the finished shadow box on a stand or easel as a centerpiece for Halloween dinner parties. It serves as an excellent conversation starter and adds thematic ambiance without taking up too much table space.
- Unique Gift Giving: Handmade gifts carry a personal touch that store-bought items often lack. A custom-assembled shadow box makes for a thoughtful present for friends, family, or colleagues who appreciate handmade crafts.
- Educational Projects: Educators can use these templates to teach students about depth, perspective, and following complex instructions. It is a fun, hands-on activity that combines art with practical skills.
Technical Specifications and File Compatibility
Before diving into your project, it is essential to understand the technical aspects of the Halloween Shadow Box SVG download. Since this is a digital product, there is no physical shipping involved, allowing for immediate access to your files after purchase. This instant gratification means you can start crafting right away, which is perfect for last-minute decoration needs.
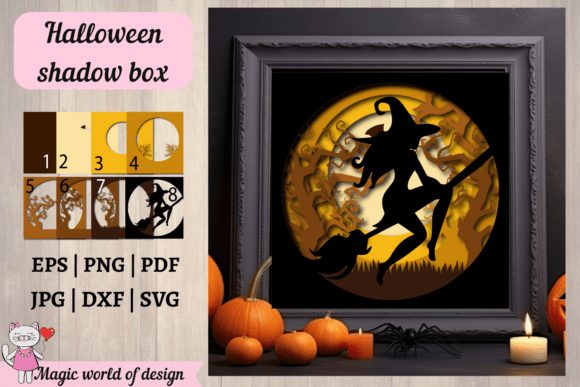
The download typically comes as a compressed zip file containing multiple formats to ensure compatibility with various software and machines. Understanding these formats helps you choose the right one for your setup:
- SVG (Scalable Vector Graphics): This is the most common format for users of Cricut Design Space, Silhouette Studio Designer Edition, and Brother ScanNCut. SVGs retain quality at any size and allow for easy manipulation of individual layers within the software.
- DXF (Drawing Exchange Format): Ideal for users of the free version of Silhouette Studio Basic Edition. If you do not have the upgraded designer software, this file type ensures you can still import and cut the design accurately.
- PNG and JPEG: These high-resolution 300 dpi images are useful for sublimation printing, digital invitations, or as reference guides while assembling the physical layers. The JPEG included often has a white background, making it easy to view the final composition.
- PDF and EPS: These formats are beneficial for professional printers or users who prefer working in Adobe Illustrator or other vector-based graphic design programs.
Material Selection and Assembly Tips
To achieve the best results with your Halloween Shadow Box SVG, material choice is critical. Standard cardstock works well, but for deeper shadows and a more premium feel, consider using heavier weight paper or even thin cardboard for the base layers. Contrast is key; using lighter colors for the background and darker shades for the foreground elements enhances the 3D effect.
When assembling, use foam adhesive squares or double-sided tape with thickness to separate the layers. The distance between layers determines the intensity of the shadow. Experiment with different spacing to see what looks best for your specific lighting conditions. Additionally, consider adding a small LED tea light behind the back layer to illuminate the scene from within, creating a glowing, eerie effect that is perfect for evening displays.
Important Considerations for Crafters
While the process is rewarding, there are a few things to keep in mind. First, ensure your cutting machine blades are sharp. Dull blades can drag on intricate cuts, leading to jagged edges that ruin the clean look of the shadow box. Second, take your time during weeding—the process of removing excess paper from the cut designs. Rushing this step can lead to accidental tears in delicate areas.
Finally, remember that this is a digital file intended for personal use or small business crafting, depending on the license terms provided by the creator. Always review the usage rights to ensure compliance, especially if you plan to sell the finished physical products. By respecting these guidelines and focusing on quality assembly, you can create stunning Halloween decor that stands out and brings a touch of eerie elegance to any space.